


Watercolour Basics
This guide has been put together by Caroline Misselbrook of Daff Workshops. All images contained in this tutorial are copyright Caroline Misselbrook. Caroline has led numerous workshops for us over the years as part of our Staff Arts Club programme. She has provided us with this simple introduction so you can experiment with watercolour at home and create some quirky and colourful bee examples of your own.
My tutorial will take you through some basic watercolour techniques however, experimentation and an adventurous spirit is key, so don’t worry if you get things wrong or it takes a while to achieve them. You can also make up your own…the most important thing to remember is to have fun! Watercolour paint has a mind of its own and you can’t control it too much. The beauty is in the imperfections, if you over work it the paint will become muddy and the paper will get chewed up. There is also a fine balance between too much and too little water depending on the effect you are trying to master…good luck!
Equipment
- basic set of watercolour paints and the brush that it comes with
- water pot
- relatively good quality watercolour paper, smooth or textured – some cheaper papers can be more difficult to work with
Getting started
Painting out your colour palette
Painting out a test swatch of your colour palette when you first use your watercolour set helps you to gain a better understanding of how much water each colour needs to achieve a nice consistency. It shows how each colour will look on the paper and their transparency and opacity.
Shading
Try loading your paint brush with a colour and create a shaded strip, starting at one end of your paper and moving your brush in smooth zig zag strokes until you run out of paint (you may need to collect some more water on your brush if it starts to dry out).
Brush Strokes, Dabbing, Splashes and Splatters
These techniques require lots of experimentation on your part and differ depending on what type of brushes you use. You can try different materials to dab paint with…how about putting salt on wet paint?
‘Wet on Wet’, ‘Run’, ‘Wet on Dry’ and ‘Water next to Wet’
These are quite self-explanatory, but again require some experimentation as some colours will react differently when they are dripped onto other colours. When you paint a strip of water and then paint some colour next to it you’ll have fun seeing how the water sucks up the paint.
Step by step instructions to paint a bumble bee
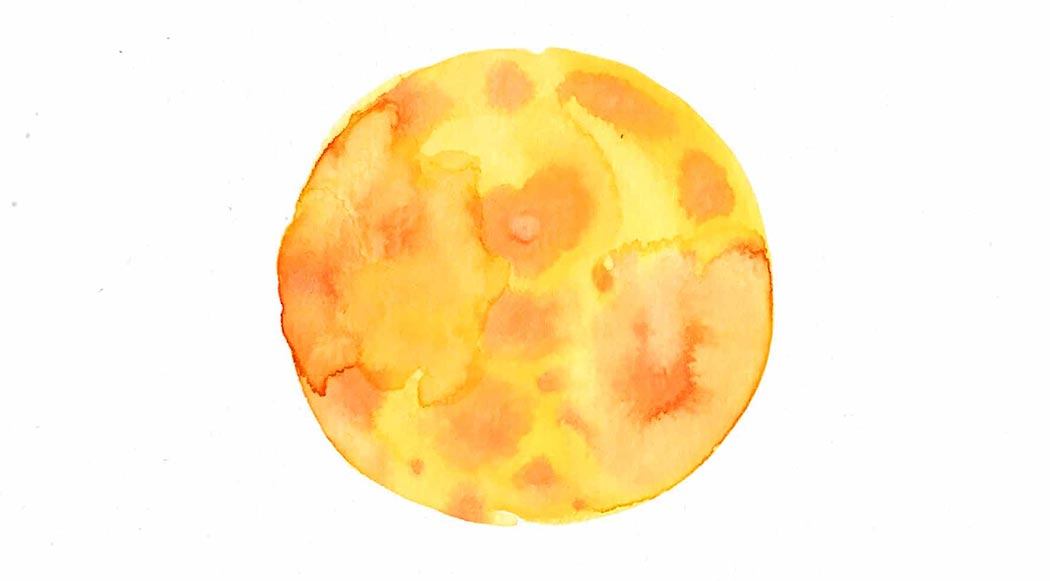
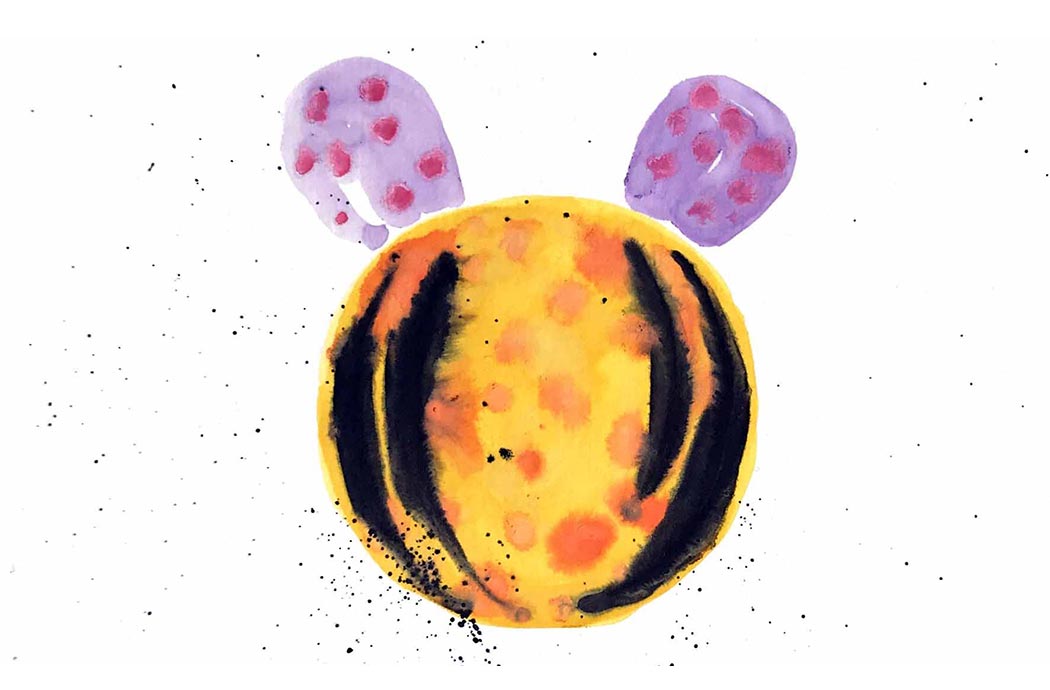
- Start by painting a circle of yellow, while it’s still wet drip in some spots of orange.
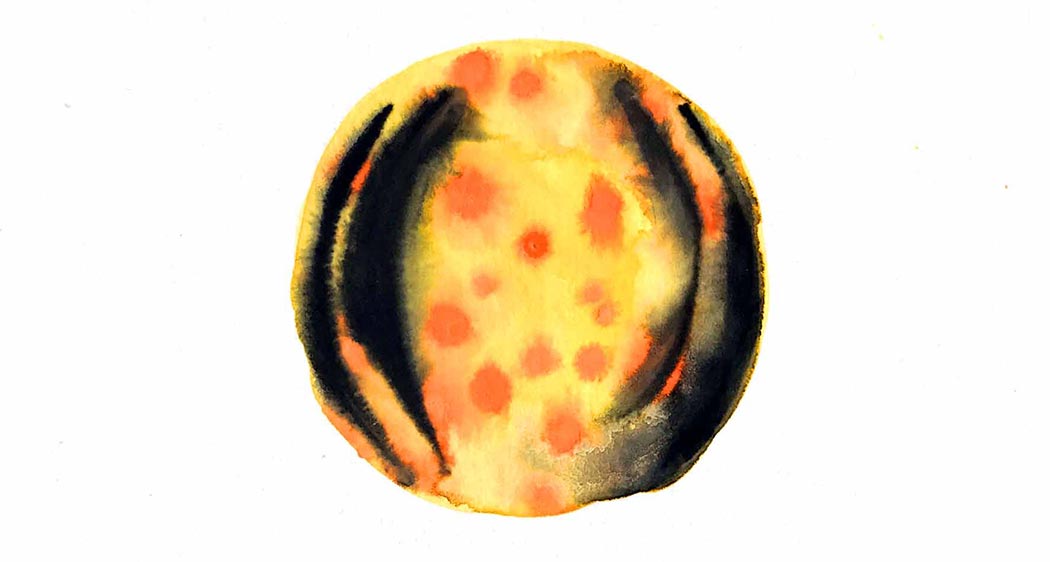
- Before the yellow and orange paint have dried paint two strips of black on either side of the circle to form the bee’s stripes.
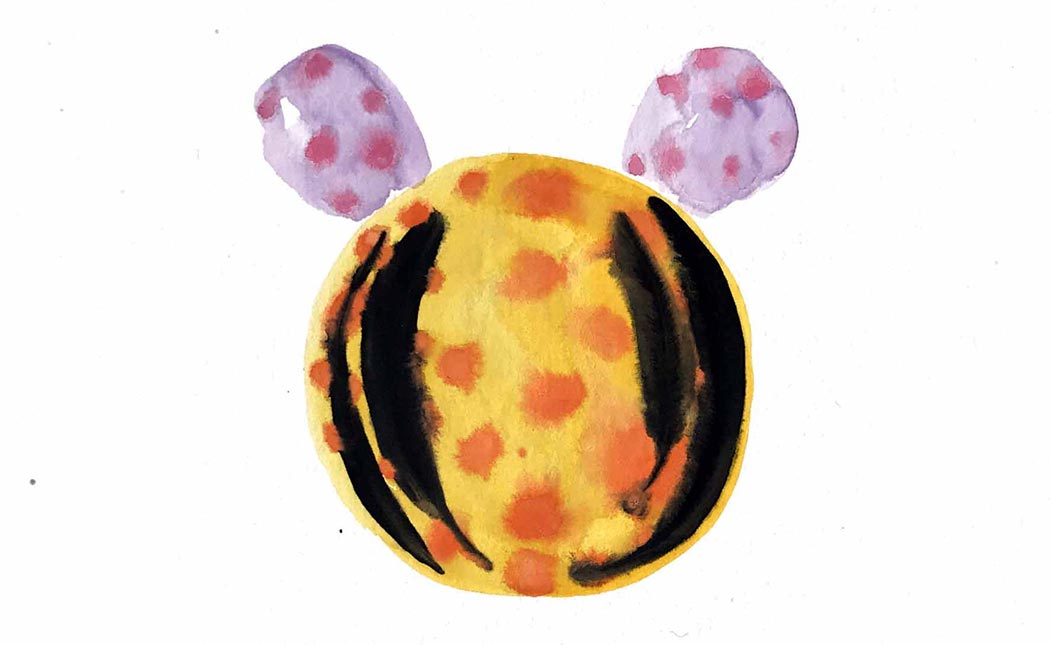
- Create two wing shapes in a colour of your choice and while they’re till wet drip little spots of another colour to make a polka dot effect.
- Add some splatters and splashes to your bee – I love doing this because it creates a nice texture and feeling of movement.
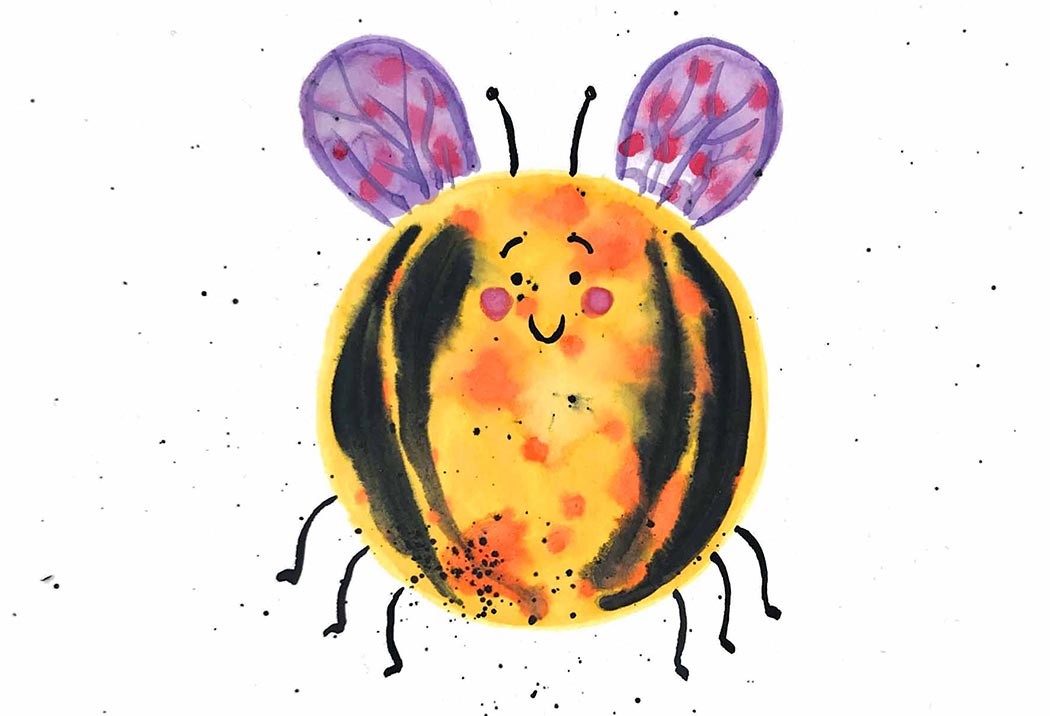
- Once everything has dried completely you can add all the details: legs, mouth, eyes, cheeks, eyebrows, lines on the wings and antennae.
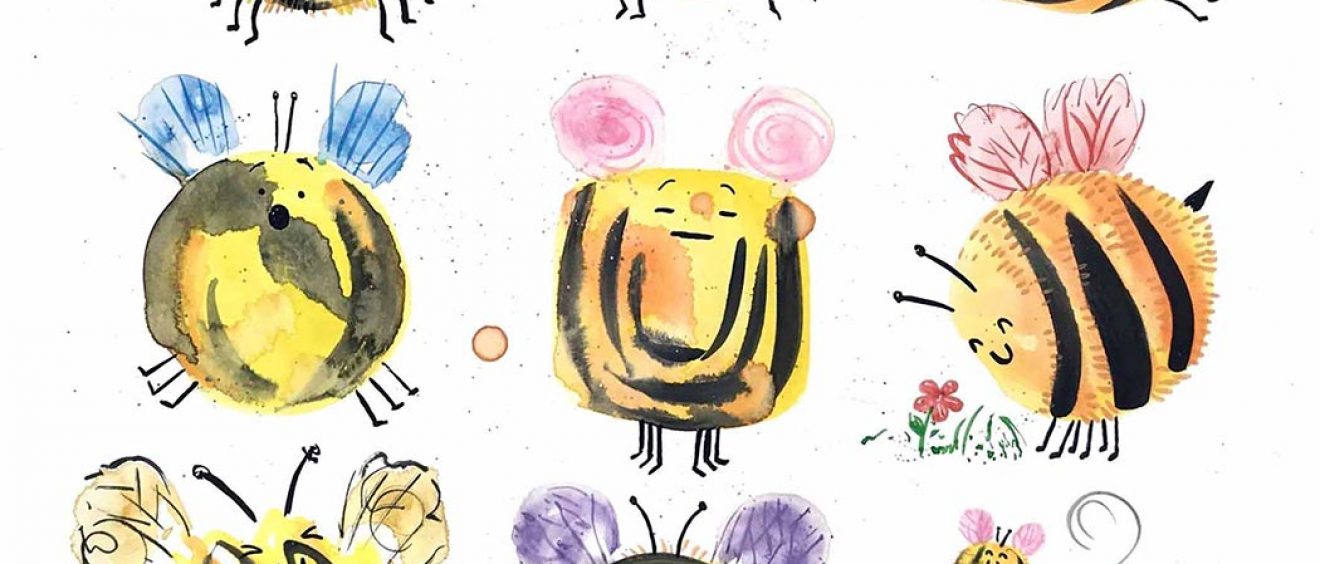
- Watch my two videos (below, scroll down) and see me paint two example bees. Also, have a look at my different bee designs (below, you can click the image to enlarge) for some more inspiration when creating your own illustrations! Have fun experimenting with expressions, props, poses, angles, size and shape. I’d love to see what you get up to…share your watercolour paintings with me on Instagram or Facebook by tagging Daff Workshops.

Example videos
Download instructions
Download Caroline’s watercolour basics instructions (pdf)
Next steps
Extend your skills with our watercolour wildflowers activity