Digital Drawing Basics
![]()
There are lots of digital drawing apps. For this tutorial we have used Autodesk Sketchbook, which is available across different devices and can be downloaded for free from the Playstore and ITunes.
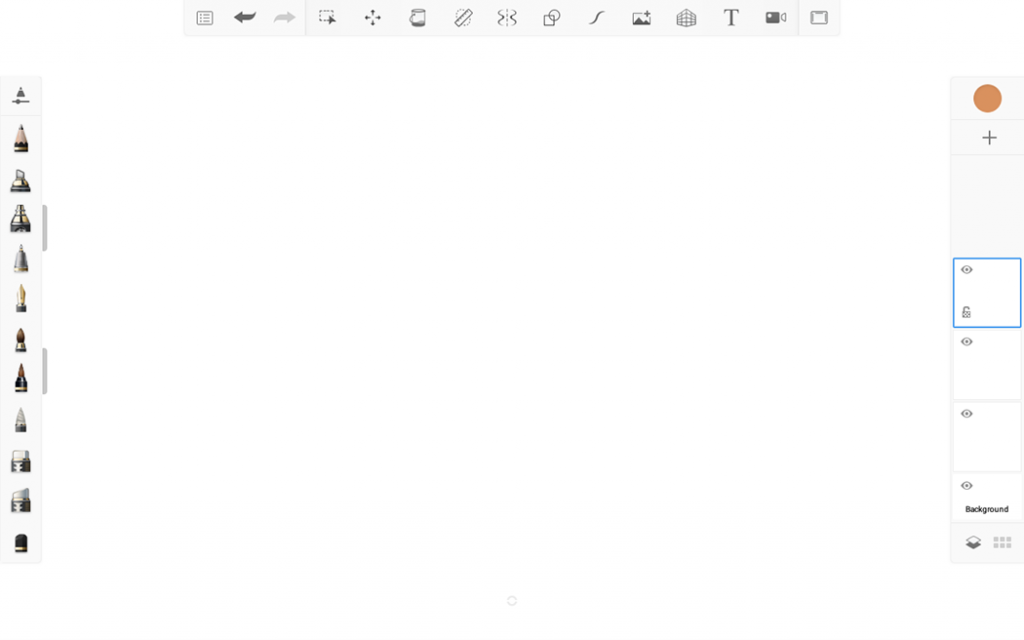
The screen view
Once installed, open the app on your device. Your screen should look something like this on your tablet.
Mobile phones are slightly different with the tools stacked at the top of the screen (click each to enlarge and find more tools)
The tools you will be using
Some of the main tools on the app that you will be using during this tutorial are shown below. To draw we recommend using a rubber tipped pen to draw on your tablet or mobile phone. These pens should only cost a small amount (less than £1 in multi packs) and are available to purchase online.
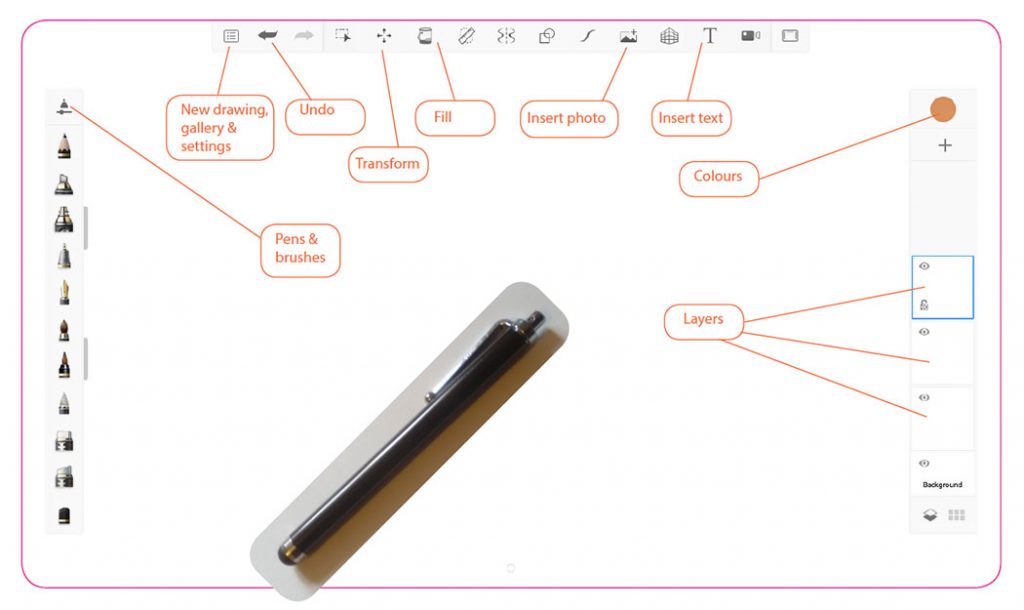
Pens and brushes
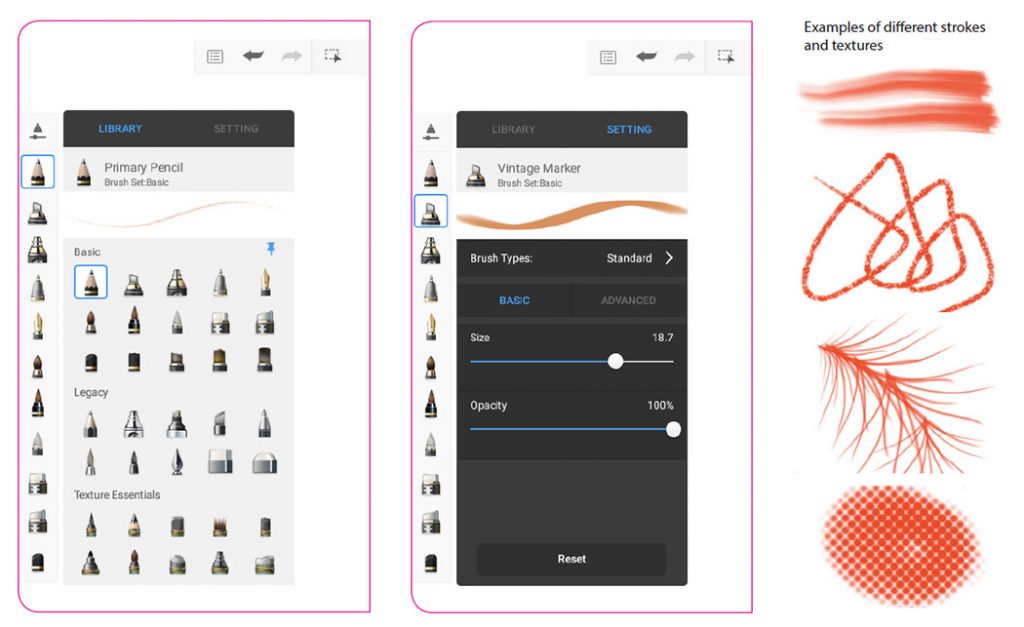
Choose your brushes and styles by clicking pens & brushes button and select from LIBRARY – scroll down the icons to try out different brushes and art textures. You can adjust the size and strength of these by clicking SETTING and use the sliders (an example of what it will look like is previewed at the top)
Working in layers
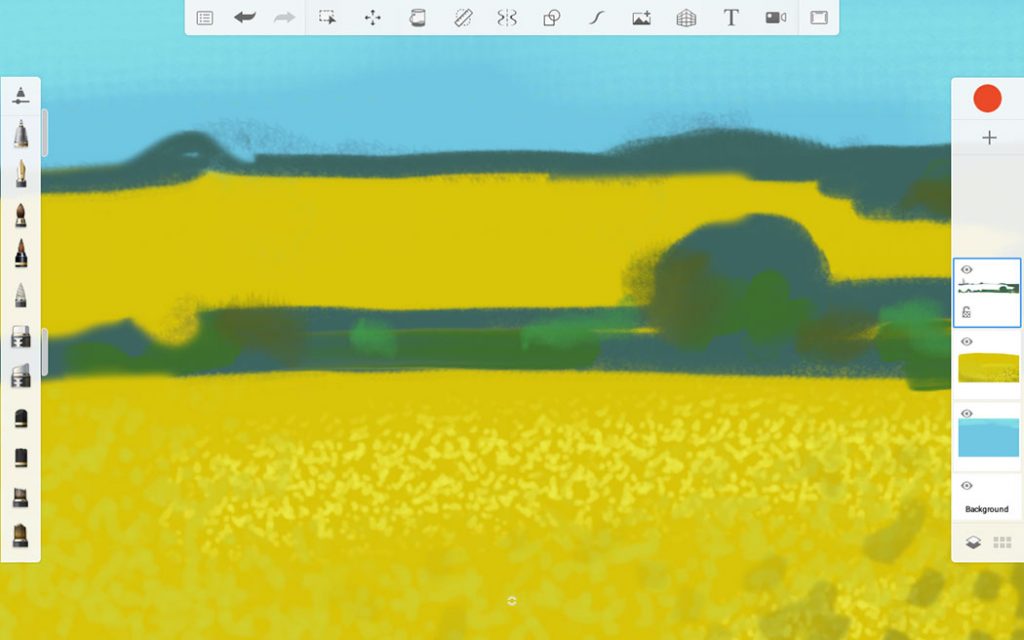
The most important way to work is in separate layers for each part of your drawing, this means that you can adjust colours and shapes without upsetting the whole drawing. For example when drawing a landscape, paint in the sky then add a layer using the + sign , you can then add the grass, add another layer and then draw in a tree. If you have to erase a mistake you will now be able to do this without removing other areas of your sketch. You can also drag & drop layers to re-order them, bringing them forward or backwards in your drawing.
Inserting a photo
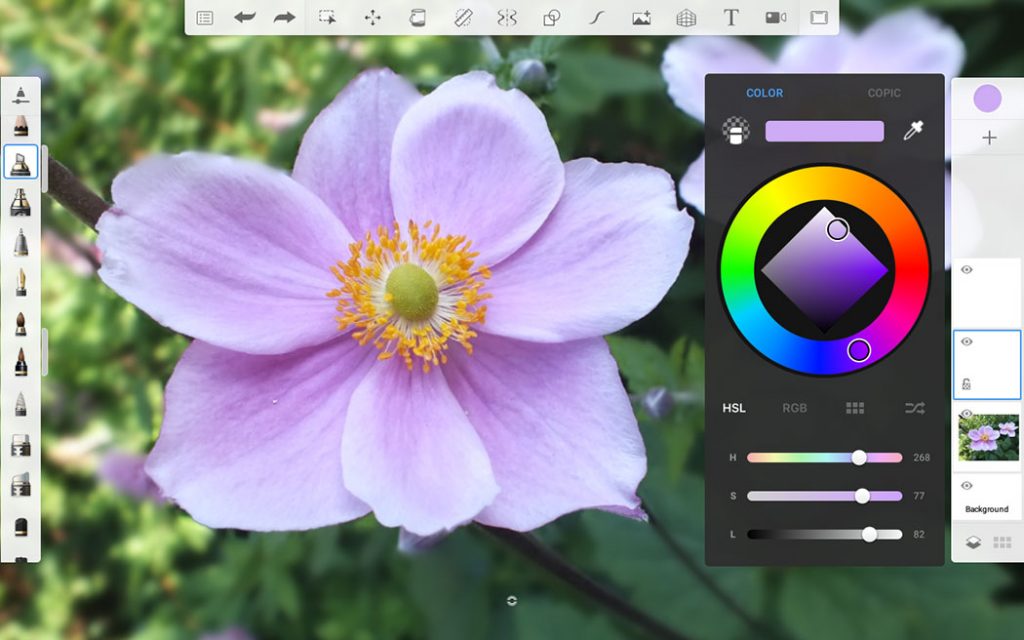
You can work from a photograph, by clicking the insert image button on the top menu. You can insert an image from your photo library or take a picture with your camera, eg. the view you are looking at if you are sketching outdoors! PRO TIP: If you are not confident with your drawing skills try adding a photo into the bottom layer and you can trace over the top with your drawing. At the end you can hide the photograph by clicking eye logo (found in the top left corner on the layer).
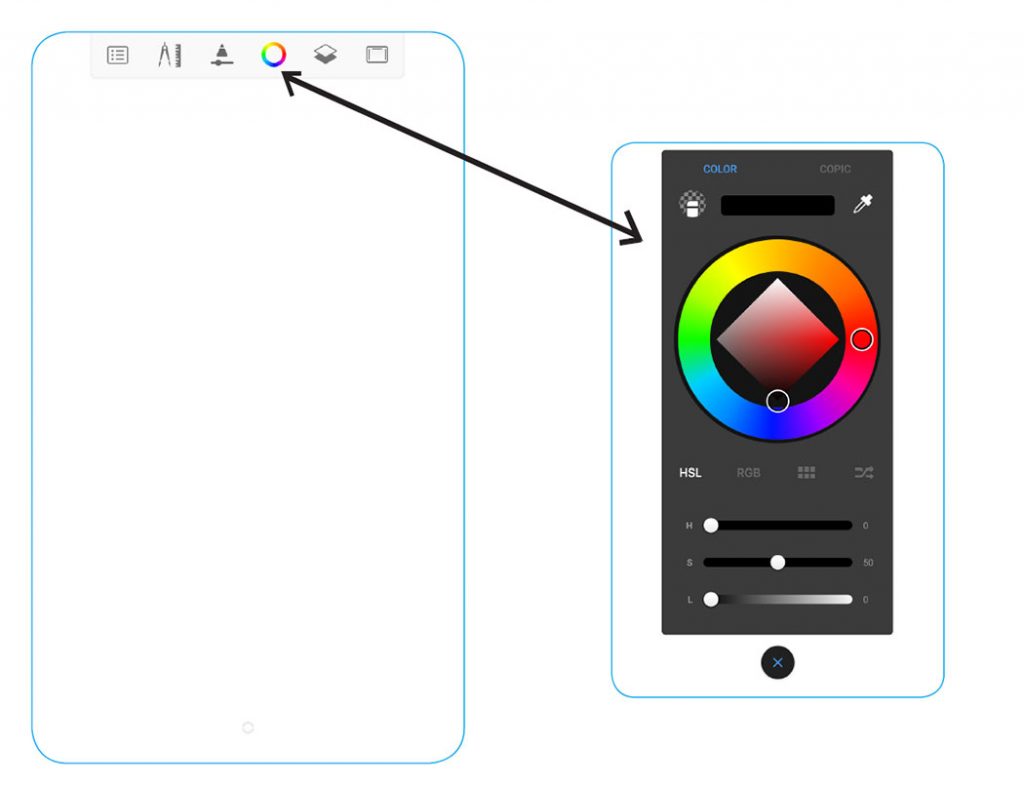
Colours
To change your ink colour click the colour dot, you can manually select your colour by clicking on different areas of the colour wheel. If you are using a photograph as a base for your drawing (see insert photo above) you can colour pick to match the photograph by clicking on the dropper tool and moving the target around your image.
Next steps – Practice activities
Why not try out our practice activities next? Each activity has a handy video guide to help you.
- Practice activity 1 – Abstract patterns
- Practice activity 2 – Landscapes
- Practice activity 3 – Experimenting with colour
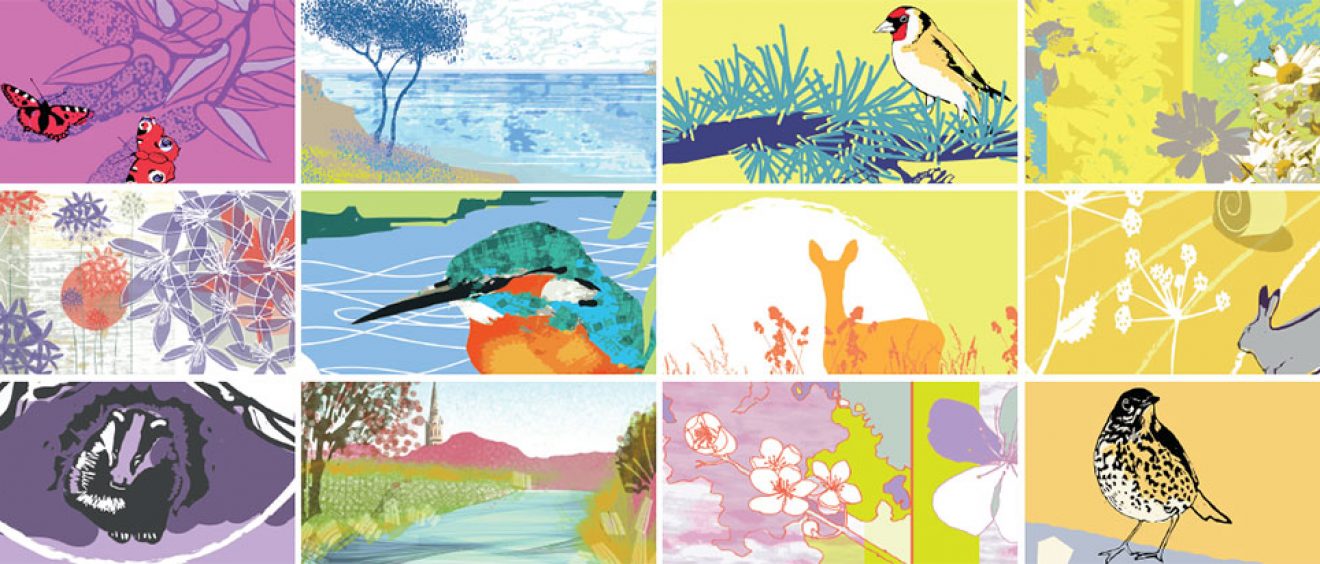
For more inspiration follow our digital drawing board on Pinterest
Download instructions and examples
Download our digital drawing instructions
Download our digital drawing examples (for personal use only)